// Introduction
You know those afternoons when the kids beg to help in the kitchen? Those moments are perfect for simple, hands-on cooking that builds confidence. These easy recipes for kids to make at home are kid-tested and parent-approved.
You’ll find no-bake snacks, quick bakes, and simple stovetop projects. Each recipe lists clear ingredients, exact measurements, and step-by-step instructions. The recipes focus on safe steps kids can do with a little supervision. Keep this list handy for rainy days, lunchbox ideas, and quick family breakfasts. Now let’s get cooking — and make kitchen time fun, tasty, and manageable.
1. No-Bake Fruit Yogurt Parfaits — Easy Recipes for Kids to Make at Home
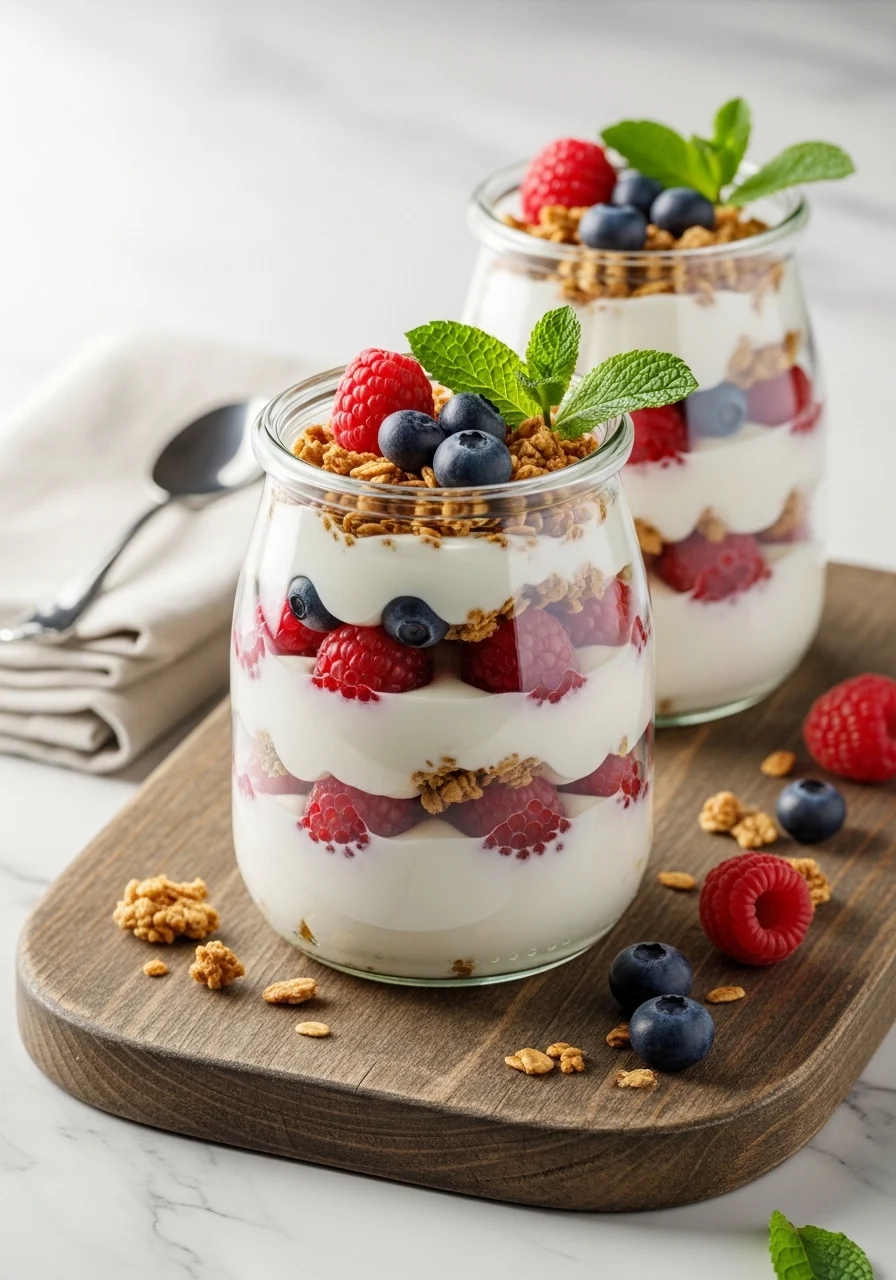
This no-bake fruit yogurt parfait is playful and colorful. Kids layer creamy yogurt, sweet fruit, and crunchy granola. The texture mixes smooth, tart, and crunchy in every spoonful. It’s quick, healthy, and perfect for breakfast or snack time. Young cooks will love assembling layers and picking favorite fruits. The jars smell fresh and look rainbow-bright.
Prep: 10 minutes | Cook: 0 minutes | Serves: 4
Ingredients
- 2 cups plain Greek yogurt
- 2 tbsp honey (for drizzling)
- 1 tsp vanilla extract
- 1 cup granola (store-bought or homemade)
- 1 cup strawberries, hulled and sliced
- 1 cup blueberries
- 1 cup diced mango
- 1 banana, sliced
- 2 tbsp chia seeds
- 4 small clear jars or glasses
- Fresh mint leaves for garnish
Instructions
- Wash all fruit under cold water and pat dry.
- In a bowl, stir Greek yogurt, honey, and vanilla until smooth.
- Place 1 tbsp chia seeds into the bottom of each jar.
- Add a 2 tbsp layer of yogurt to each jar.
- Top with 2 tbsp granola and a few slices of strawberry.
- Repeat layers: yogurt, mango, granola, banana, and blueberries.
- Finish with a drizzle of honey, a sprinkle of granola, and a mint leaf.
- Chill 10 minutes if you want the chia to soften slightly.
- Serve with a small spoon and check that jars are sealed upright during transport.
How to Serve It
- Serve parfaits in clear jars to show colorful layers.
- Garnish with a mint sprig and a few whole berries for pop.
- Pair with milk, juice, or a smoothie for breakfast.
- Store covered in fridge up to 24 hours; granola stays crunchiest if added just before serving.
- Make-ahead tip: prep fruit and yogurt separately; assemble within 2 hours.
- Great for spring brunches and easy party snacks.
2. Mini Pita Pizzas — Easy Recipes for Kids to Make at Home
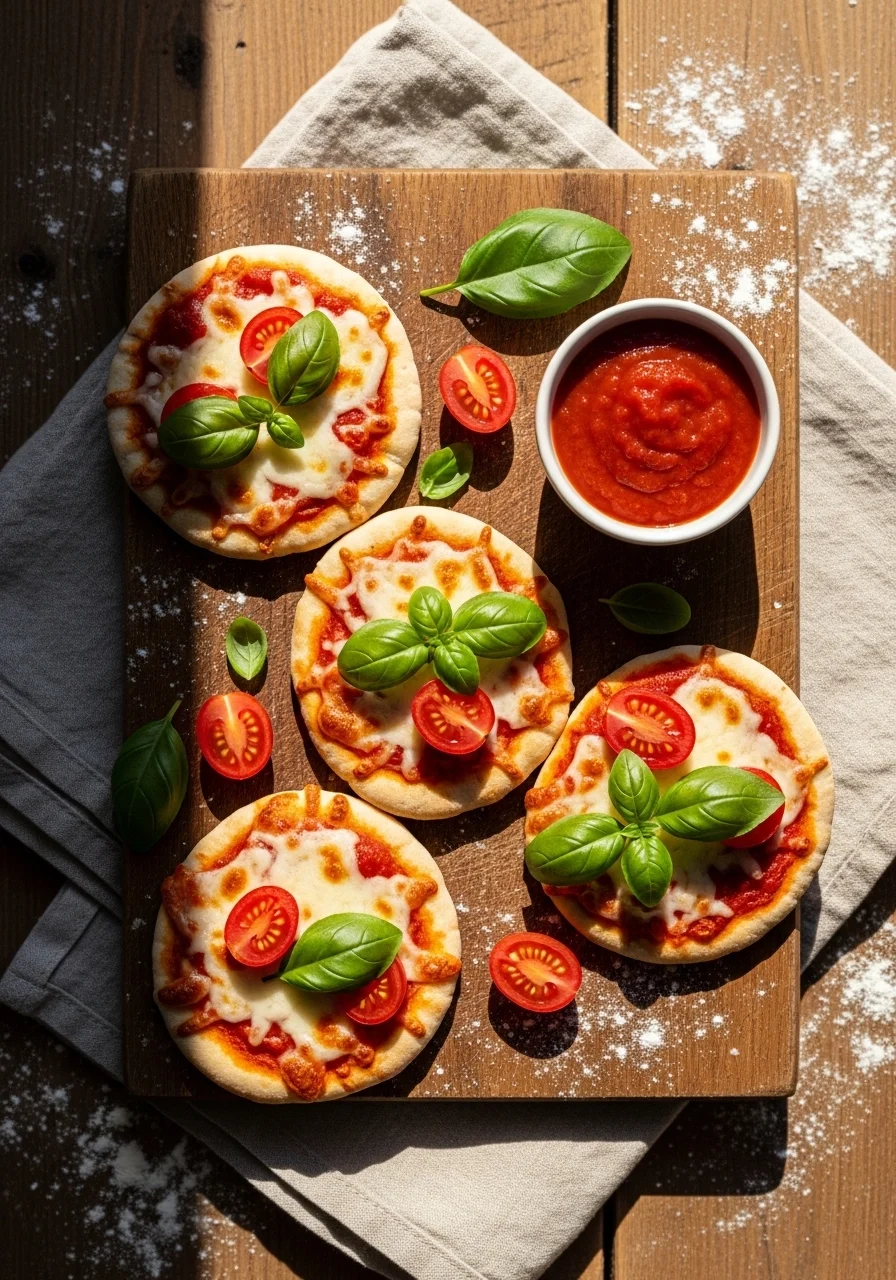
Mini pita pizzas are simple and hands-on. Kids spread sauce and arrange toppings on mini pitas. The crust is soft with golden cheese edges and crisp bottoms. It’s a fun lunch or dinner idea for picky eaters. Everyone can pick their own toppings and taste combinations. The aroma of baked bread and tomato fills the kitchen.
Prep: 10 minutes | Cook: 10–12 minutes | Serves: 4
Ingredients
- 4 mini whole-wheat pitas
- 1 cup marinara sauce
- 1 1/2 cups shredded mozzarella cheese
- 1/2 cup shredded cheddar cheese
- 1/2 cup mini pepperoni or diced bell peppers
- 1/2 cup sliced black olives
- 1/2 cup sliced mushrooms, wiped clean
- 1/4 cup chopped fresh basil
- 1 tsp olive oil
- 1/4 tsp dried oregano
- Salt and pepper to taste
- Baking sheet lined with parchment
Instructions
- Preheat oven to 425°F (220°C) and line a baking sheet.
- Place pitas on the sheet and brush each with 1/4 tsp olive oil.
- Spoon 2–3 tbsp marinara onto each pita, spreading thinly.
- Sprinkle a mix of mozzarella and cheddar evenly over each.
- Add toppings: pepperoni, bell peppers, olives, and mushrooms.
- Season with a pinch of oregano, salt, and pepper.
- Bake 10–12 minutes until cheese is melted and edges are golden.
- Let pizzas cool 3–4 minutes before slicing with a pizza cutter.
- Check doneness: cheese should be bubbly; edges golden brown.
How to Serve It
- Plate mini pizzas on a wooden board and garnish with fresh basil.
- Offer dipping sauces: extra marinara, ranch, or pesto.
- Pair with carrot sticks, cucumber slices, or a small salad.
- Store leftovers in fridge up to 2 days; reheat in oven at 350°F (175°C) for 6–8 minutes to crisp.
- Make-ahead: assemble pitas on tray and refrigerate for up to 24 hours before baking.
- Great for pizza parties and quick weeknight dinners.
3. Banana Oat Pancake Bites — Easy Recipes for Kids to Make at Home
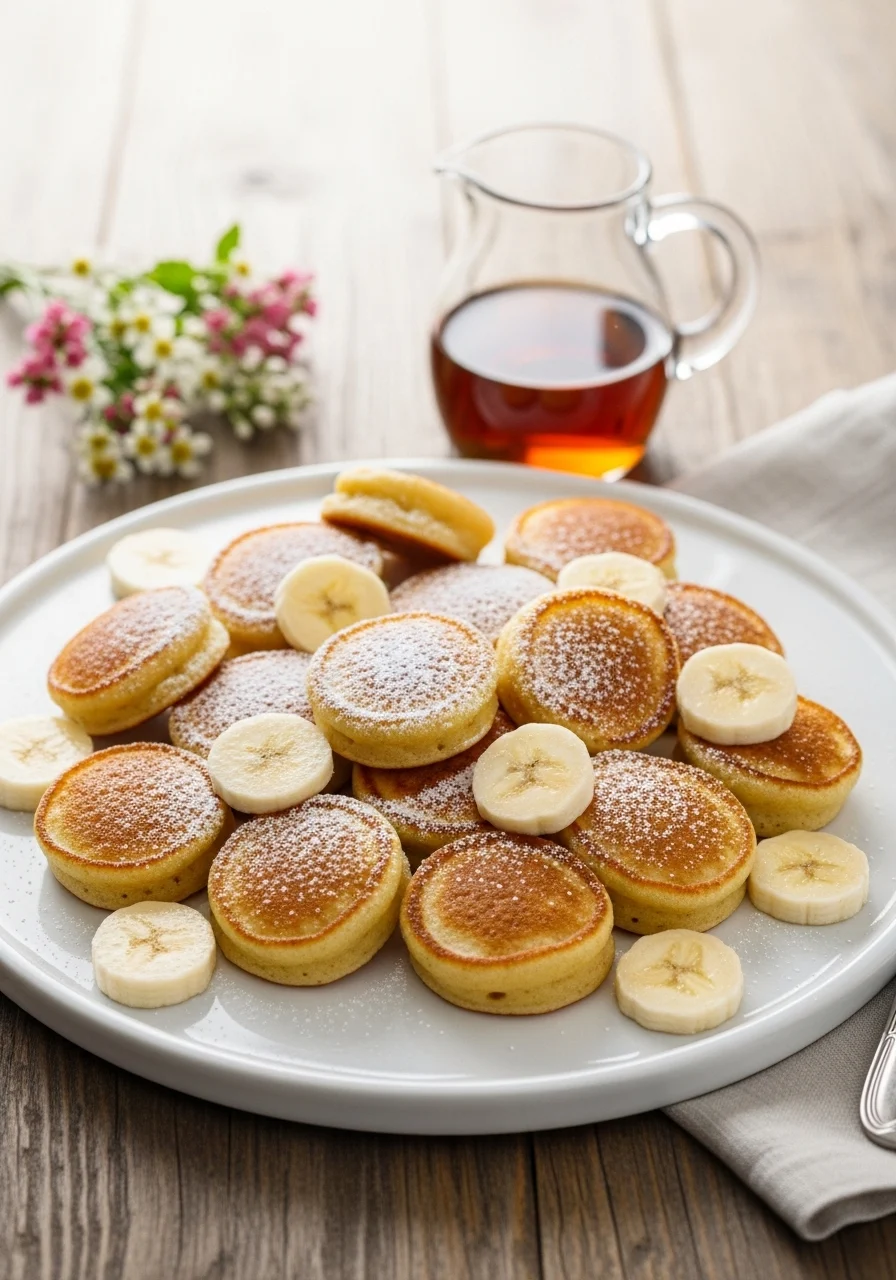
These banana oat pancake bites are soft and slightly chewy. They pack natural sweetness from ripe banana and a warm oat aroma. Kids can mash bananas and scoop batter into the pan. They’re perfect for breakfast, snack, or lunchbox treats. The flavor is mildly sweet with banana and vanilla notes, and the texture is tender.
Prep: 8 minutes | Cook: 12 minutes | Serves: 3–4
Ingredients
- 1 large ripe banana, mashed
- 1 cup rolled oats
- 1/2 cup milk (dairy or plant-based)
- 1 large egg, room temperature
- 1 tsp vanilla extract
- 1 tbsp maple syrup
- 1/2 tsp baking powder
- 1/4 tsp ground cinnamon
- Pinch of salt
- 2 tbsp butter or oil for cooking
- Fresh banana slices and berries for topping
Instructions
- Blend or pulse rolled oats into a coarse flour in a food processor.
- In a bowl, whisk egg, milk, vanilla, and maple syrup.
- Stir in mashed banana, oat flour, baking powder, cinnamon, and salt until combined.
- Heat a nonstick skillet over medium-low heat and add 1 tbsp butter.
- Spoon 2 tbsp batter per mini pancake into skillet.
- Cook 1.5–2 minutes until bubbles form and edges set.
- Flip and cook 1–2 minutes until golden and cooked through.
- Repeat with remaining batter, adding more butter if needed.
- Check doneness by cutting one bite: center should be set and not wet.
- Let cool 2 minutes before serving.
How to Serve It
- Stack mini bites and drizzle with maple syrup.
- Top with fresh banana slices, berries, and a sprinkle of cinnamon.
- Pair with milk or a fruit smoothie for a full breakfast.
- Store cooled pancakes in fridge up to 3 days; reheat briefly in microwave.
- Make-ahead: freeze cooked bites in single layer, then rewarm in toaster oven.
- Great for weekend brunch or quick weekday mornings.
4. Rainbow Veggie Wraps with Hummus
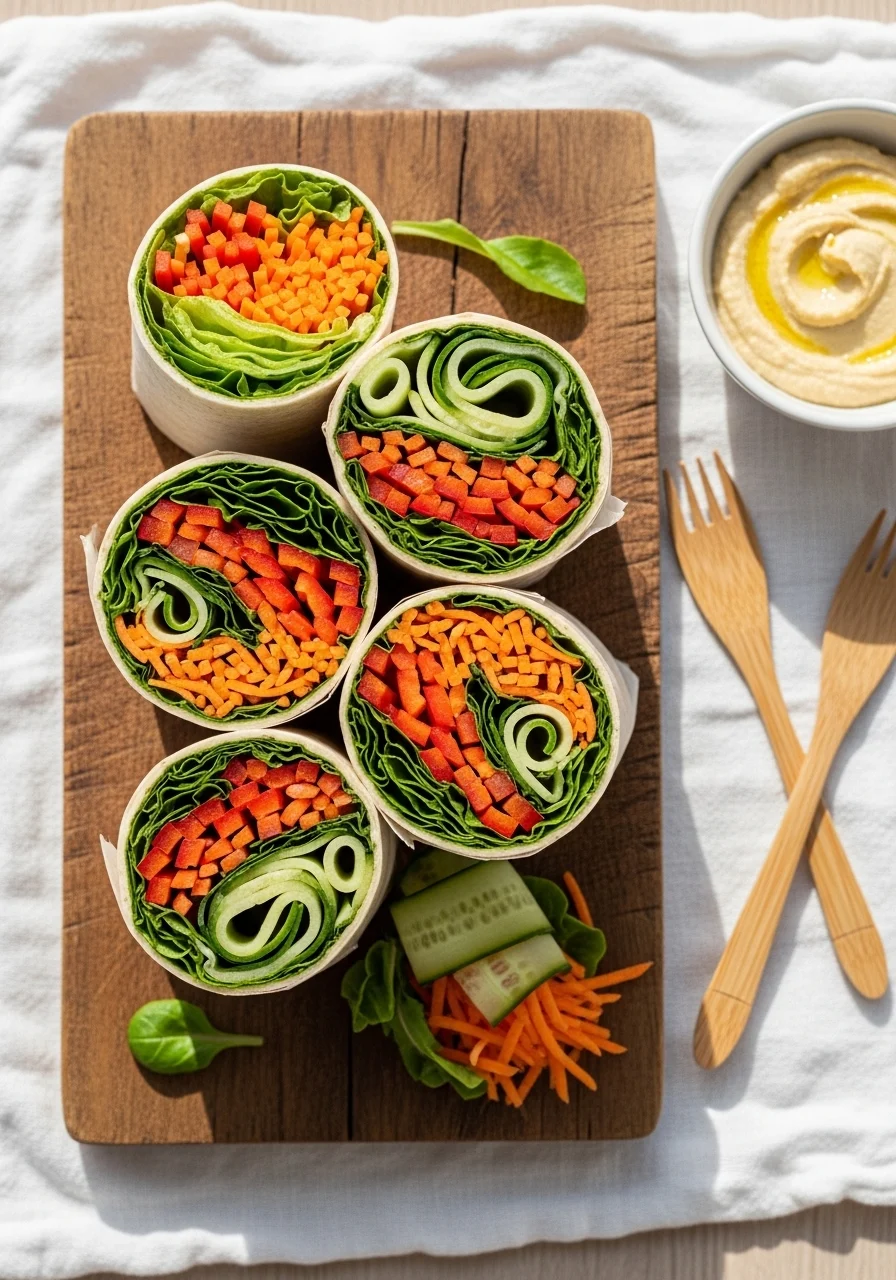
These rainbow veggie wraps are crunchy, colorful, and fresh. Kids spread hummus and layer bright veggies for a satisfying crunch. The flavor is creamy hummus with crisp vegetables and a hint of lemon. They work as a light lunch, picnic food, or snack. Little hands love rolling and choosing color combos. The wraps smell bright and earthy.
Prep: 15 minutes | Cook: 0 minutes | Serves: 4
Ingredients
- 4 large whole-wheat tortillas
- 1 cup hummus (store-bought or homemade)
- 1 cup shredded red cabbage
- 1 cup carrot ribbons (use peeler)
- 1 cucumber, julienned
- 1 red bell pepper, thinly sliced
- 1 avocado, sliced, ripe
- 1 cup baby spinach leaves
- 1/4 cup crumbled feta (optional)
- 1 tbsp lemon juice
- Salt and pepper to taste
- Plastic wrap for rolling
Instructions
- Wash and prep vegetables: shred cabbage, peel carrots, julienne cucumber, and slice pepper.
- Lay a tortilla flat and spread 1/4 cup hummus evenly, leaving edges clear.
- Arrange spinach, cabbage, carrots, cucumber, bell pepper, and avocado in a line near one edge.
- Sprinkle lemon juice, salt, and pepper, and add feta if using.
- Fold sides in, then roll tightly from the filling edge.
- Wrap in plastic or parchment and press gently to seal.
- Slice each wrap in half on a diagonal with a serrated knife.
- Check that wraps hold shape; if loose, secure with toothpicks.
- Chill 5–10 minutes for easier slicing if needed.
How to Serve It
- Serve halves on a bright plate to show the rainbow cross-section.
- Garnish with a small bowl of extra hummus or tzatziki.
- Pair with fruit salad or baked sweet potato fries.
- Store wrapped in fridge up to 24 hours; add avocado just before serving to avoid browning.
- Make-ahead: assemble without avocado and slice just before serving.
- Ideal for spring lunches and picnic baskets.
5. Cheesy Quesadilla Roll-Ups
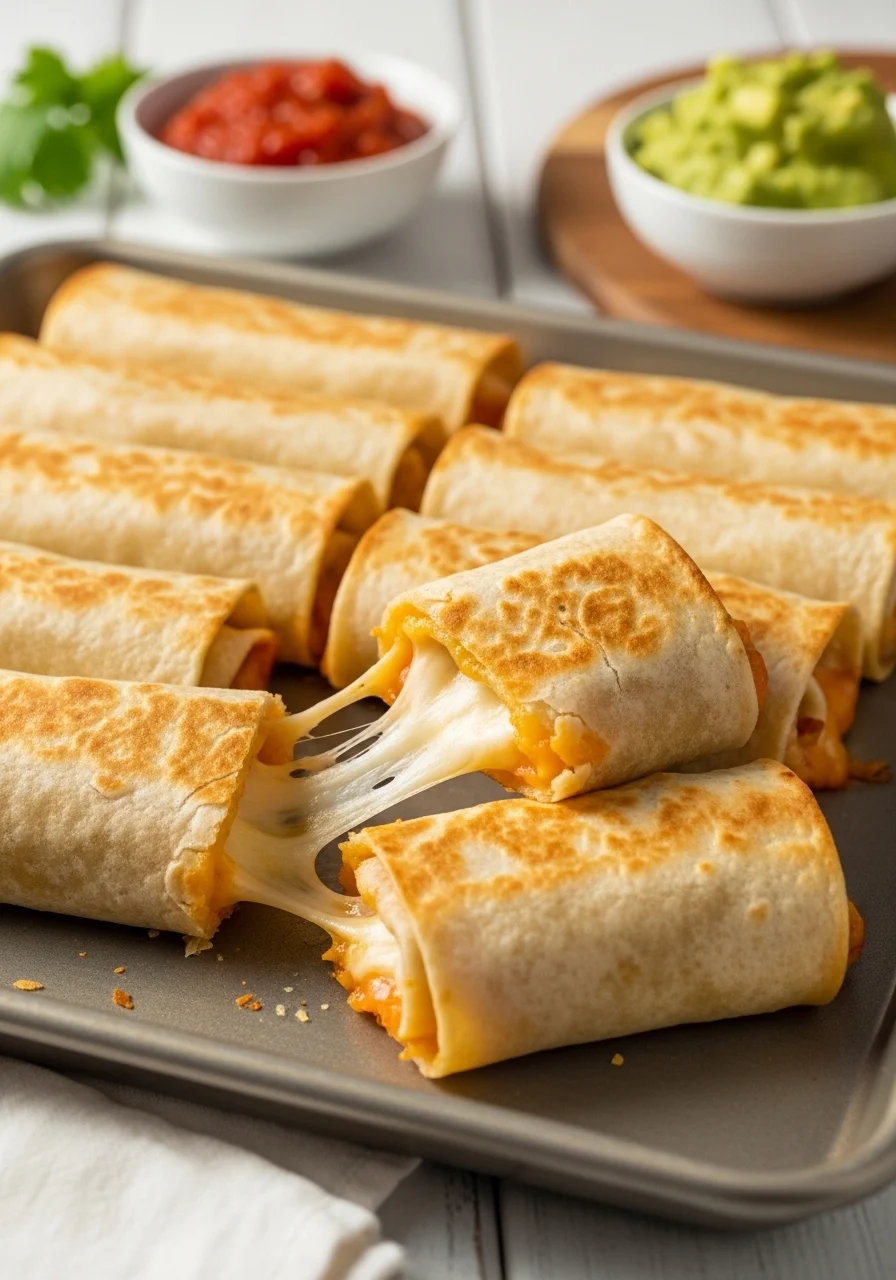
Cheesy quesadilla roll-ups are simple and fun to make. Kids spread cheese and favorite fillings, then roll and crisp them. The flavor is gooey cheese with savory fillings and a toasty edge. They’re great as an after-school snack or party finger food. Little chefs love rolling and watching cheese melt. The smell is warm and cheesy.
Prep: 10 minutes | Cook: 8–10 minutes | Serves: 4
Ingredients
- 4 large flour tortillas
- 1 1/2 cups shredded cheddar cheese
- 1 cup shredded Monterey Jack
- 1/2 cup cooked chicken, shredded (optional)
- 1/4 cup diced red bell pepper
- 1/4 cup finely chopped green onions
- 1/4 cup corn kernels (canned or cooked)
- 2 tbsp olive oil
- 1/2 tsp chili powder
- Salt and pepper to taste
- Salsa and sour cream for dipping
Instructions
- Lay tortillas flat and sprinkle 1/4 cup cheddar and 1/4 cup Monterey Jack on each.
- Add chicken (if using), bell pepper, green onions, and corn across one edge.
- Season with chili powder, salt, and pepper.
- Roll tortillas tightly and secure with toothpicks if needed.
- Heat a large skillet over medium heat and add 1 tbsp olive oil.
- Place roll-ups seam-side down and cook 2–3 minutes per side until golden and sealed.
- Rotate to brown all sides and ensure cheese is melted, about 8–10 minutes total.
- Transfer to cutting board and let rest 2 minutes before slicing into 1-inch rounds.
- Check doneness: interior should be hot and cheese fully melted.
How to Serve It
- Arrange roll-up pieces on a platter with salsa and sour cream.
- Garnish with chopped cilantro and a lime wedge.
- Pair with guacamole and a side salad for a fuller meal.
- Store in fridge up to 2 days; reheat in oven at 350°F (175°C) for 6–8 minutes to crisp.
- Make-ahead: assemble and refrigerate, then crisp before serving.
- Great for game nights and kid-friendly gatherings.
6. Frozen Banana Pops with Chocolate Drizzle
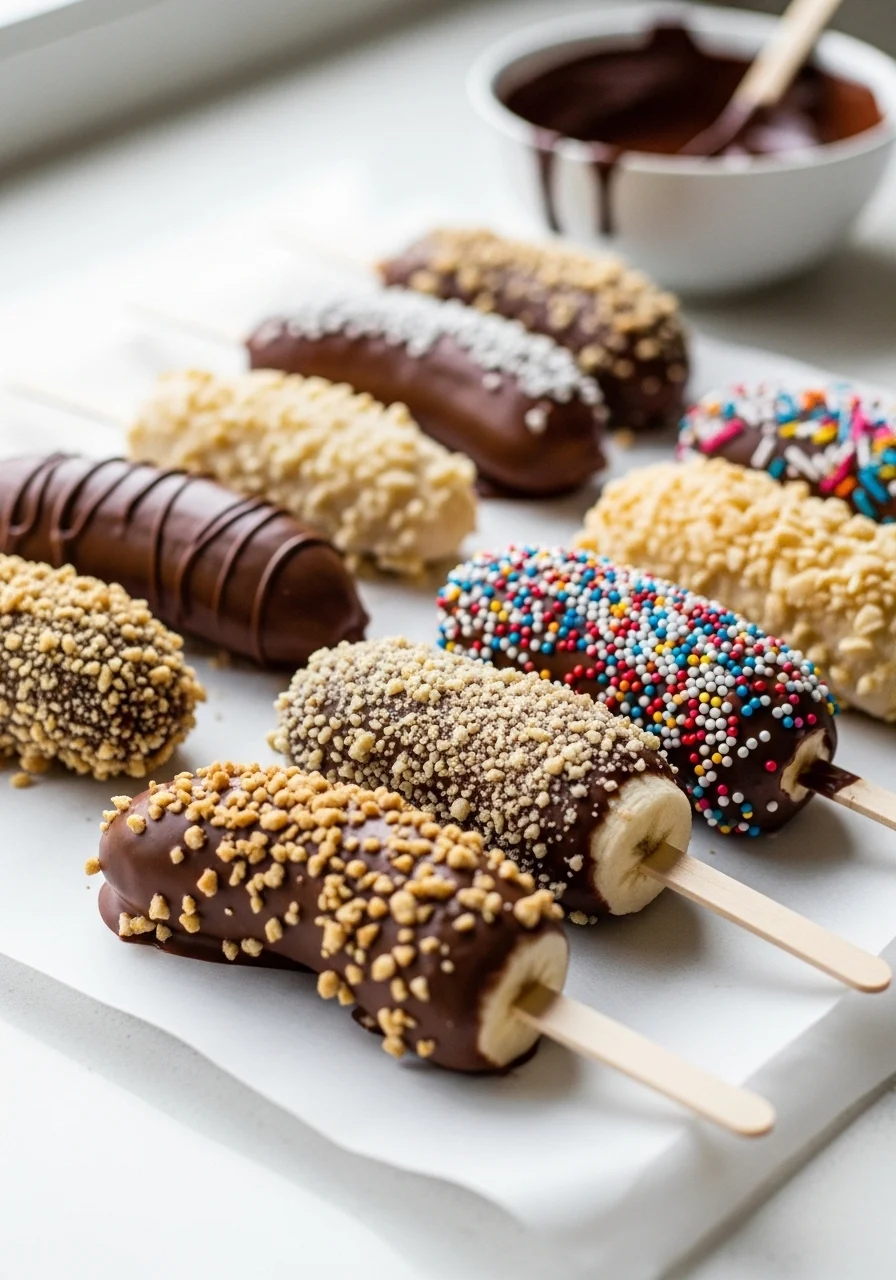
Frozen banana pops are sweet, simple, and refreshing. Kids dip bananas in chocolate and roll in toppings. They deliver creamy banana, crunchy nuts, and a chocolate snap. These pops work for dessert or a cool snack. Little hands enjoy dipping and choosing sprinkles. The pops smell of banana and warm chocolate while cooling.
Prep: 15 minutes | Freeze: 2 hours | Serves: 6
Ingredients
- 3 large ripe bananas
- 6 wooden popsicle sticks
- 1 1/2 cups semi-sweet chocolate chips
- 1 tbsp coconut oil
- 1/2 cup chopped peanuts or almonds
- 1/2 cup shredded coconut
- 1/3 cup rainbow sprinkles
- 1/4 cup crushed graham crackers
- Parchment-lined baking sheet
- Small microwave-safe bowl
Instructions
- Peel bananas and cut in half crosswise, making 6 pieces.
- Insert a wooden stick into flat end of each banana half about 1.5 inches.
- Place bananas on a parchment-lined baking sheet and freeze 30 minutes to firm.
- Melt chocolate chips with coconut oil in microwave in 20-second bursts, stirring each time.
- Dip each frozen banana in melted chocolate, letting excess drip off.
- Immediately roll in chopped nuts, coconut, sprinkles, or crushed graham crackers.
- Return pops to tray and freeze 1.5–2 hours until firm.
- Serve straight from freezer; check chocolate is fully set.
- Tip: reheat chocolate briefly if it thickens during dipping.
How to Serve It
- Serve pops on a chilled platter or in a cup of rice to stand them upright.
- Garnish with extra sprinkles and a small napkin for sticky hands.
- Pair with fruit juice or milk for dessert.
- Store in freezer for up to 2 weeks in an airtight container.
- Make-ahead: freeze fully and keep ready for quick treats.
- Perfect for summer parties and cooling down after playtime.
7. Simple Chicken Salad Sliders
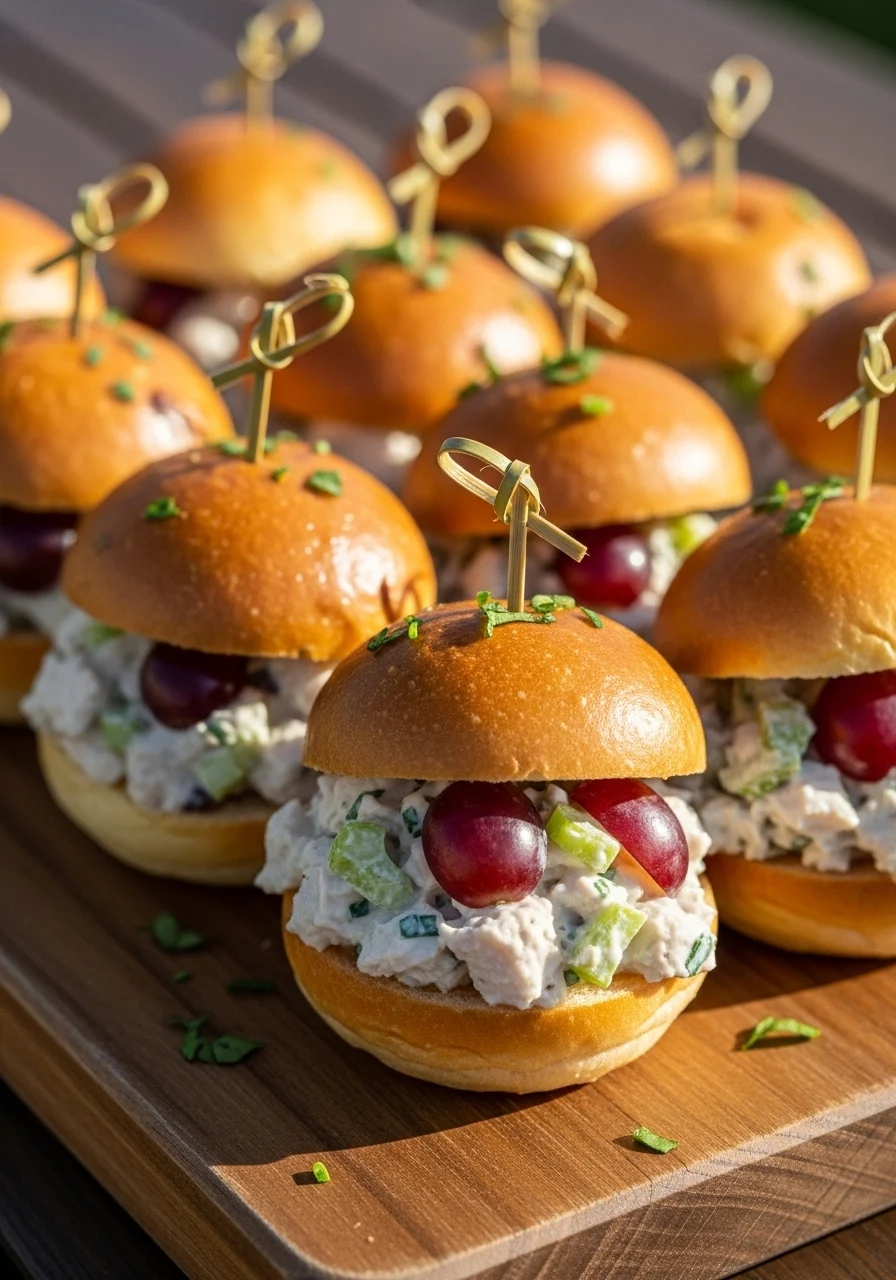
Chicken salad sliders are creamy and kid-friendly. Kids can mix ingredients and spoon filling onto small buns. The texture combines tender chicken, crunchy celery, and juicy grapes. They're great for easy lunches, picnics, or kid parties. Little ones enjoy scooping and assembling. The aroma is savory with bright citrus notes.
Prep: 15 minutes | Cook: 0 minutes (use pre-cooked chicken) | Serves: 6 sliders
Ingredients
- 2 cups cooked chicken, shredded (rotisserie or poached)
- 1/2 cup mayonnaise
- 1/4 cup plain Greek yogurt
- 1 tsp Dijon mustard
- 1 tbsp lemon juice
- 1/3 cup finely chopped celery
- 1/2 cup seedless grapes, halved
- 2 tbsp chopped fresh parsley
- 1/4 tsp salt
- 1/4 tsp black pepper
- 6 small slider buns, split
- Butter for toasting buns (optional)
Instructions
- In a bowl, combine mayonnaise, Greek yogurt, Dijon, and lemon juice.
- Stir in shredded chicken, celery, grapes, and parsley.
- Season with salt and pepper; mix until evenly coated.
- Taste and adjust lemon or seasoning as needed.
- Lightly butter and toast slider buns in a skillet over medium heat 1–2 minutes per side.
- Spoon about 1/3 cup chicken salad onto each bottom bun.
- Top with bun halves and press gently.
- Chill 10 minutes if you want filling firmer before serving.
- Check that chicken is cold before assembling for food safety.
How to Serve It
- Cut sliders in half and serve on a wooden board with toothpicks.
- Garnish with extra parsley and a pickle spear.
- Pair with veggie sticks, apple slices, or kettle chips.
- Store filling separately in fridge up to 2 days; assemble before serving.
- Make-ahead: mix chicken salad up to 24 hours ahead for easier assembly.
- Great for lunches, potlucks, and backyard picnics.
8. Baked Apple Oat Cups
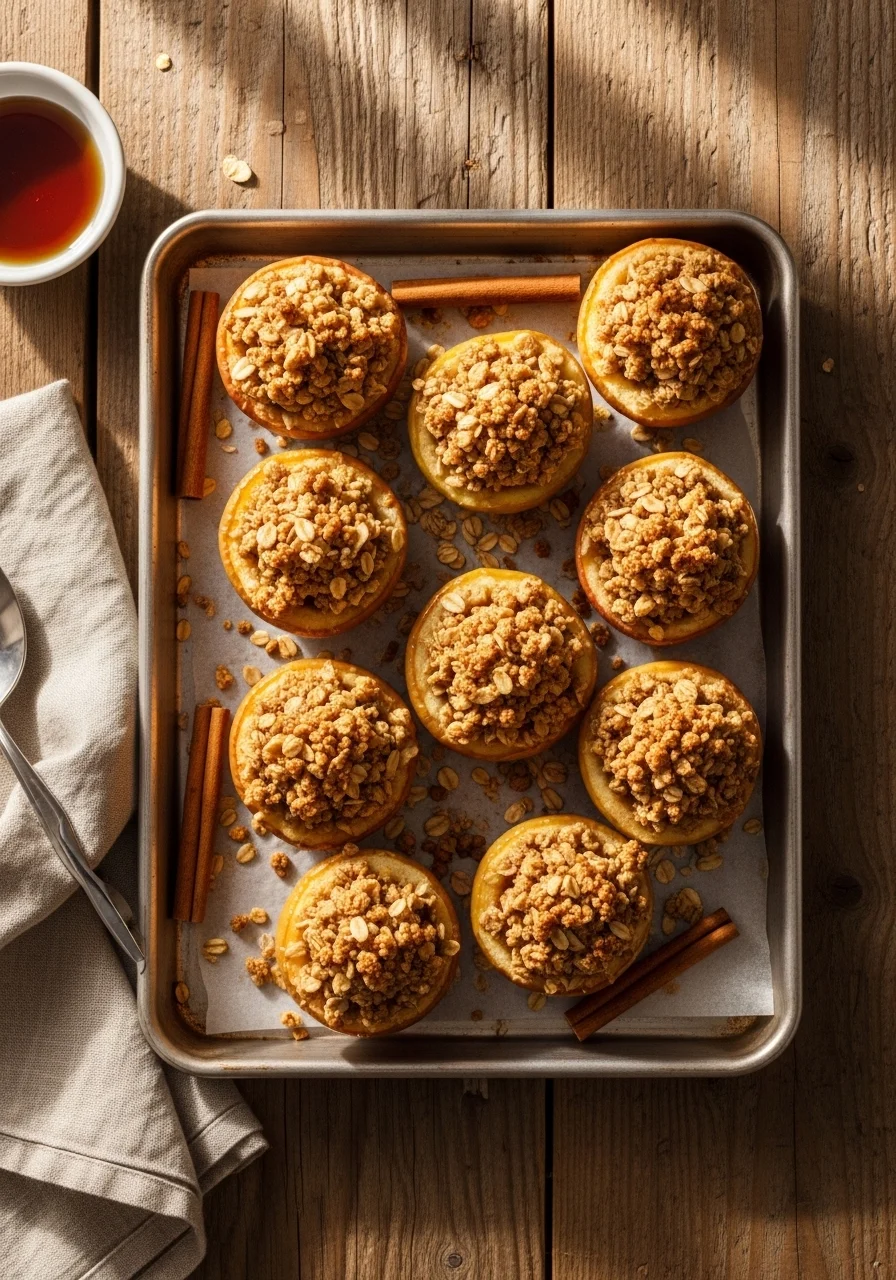
Baked apple oat cups are cozy and slightly crisp. Kids can scoop apple flesh and mix oat filling to stuff apples. The flavor is warm cinnamon, sweet apple, and nutty oats. They work for breakfast or dessert and smell like fall. Children enjoy scooping and sprinkling crumbs. The cups are tender with a crunchy topping.
Prep: 15 minutes | Cook: 30 minutes | Serves: 6
Ingredients
- 6 medium apples (Honeycrisp or Fuji), cored
- 1 cup rolled oats
- 1/2 cup all-purpose flour
- 1/3 cup brown sugar, packed
- 1/4 cup chopped walnuts or pecans
- 1 tsp ground cinnamon
- 1/4 tsp ground nutmeg
- 1/4 tsp salt
- 1/3 cup melted butter
- 2 tbsp maple syrup
- 1 tsp vanilla extract
- Baking dish and foil
Instructions
- Preheat oven to 375°F (190°C) and lightly grease a baking dish.
- Cut apples in half and use a spoon to scoop out core and some flesh to make cups.
- In a bowl, mix oats, flour, brown sugar, nuts, cinnamon, nutmeg, and salt.
- Stir in melted butter, maple syrup, and vanilla until crumbly.
- Spoon oat mixture into each apple half, pressing lightly to pack.
- Place apples cut-side up in the baking dish and cover with foil.
- Bake 20 minutes, remove foil, and bake 10 more minutes until tops are golden.
- Check doneness by piercing apples with a fork; should be tender.
- Cool 5 minutes before serving.
How to Serve It
- Serve warm with a dollop of yogurt or vanilla ice cream.
- Garnish with a sprinkle of cinnamon and extra chopped nuts.
- Pair with warm tea or milk for a cozy snack.
- Store in fridge up to 3 days; reheat in oven at 325°F (160°C) for 8–10 minutes.
- Make-ahead: assemble and refrigerate, then bake when ready.
- Perfect for autumn mornings and holiday breakfasts.
9. Peanut Butter & Jelly Sushi Rolls
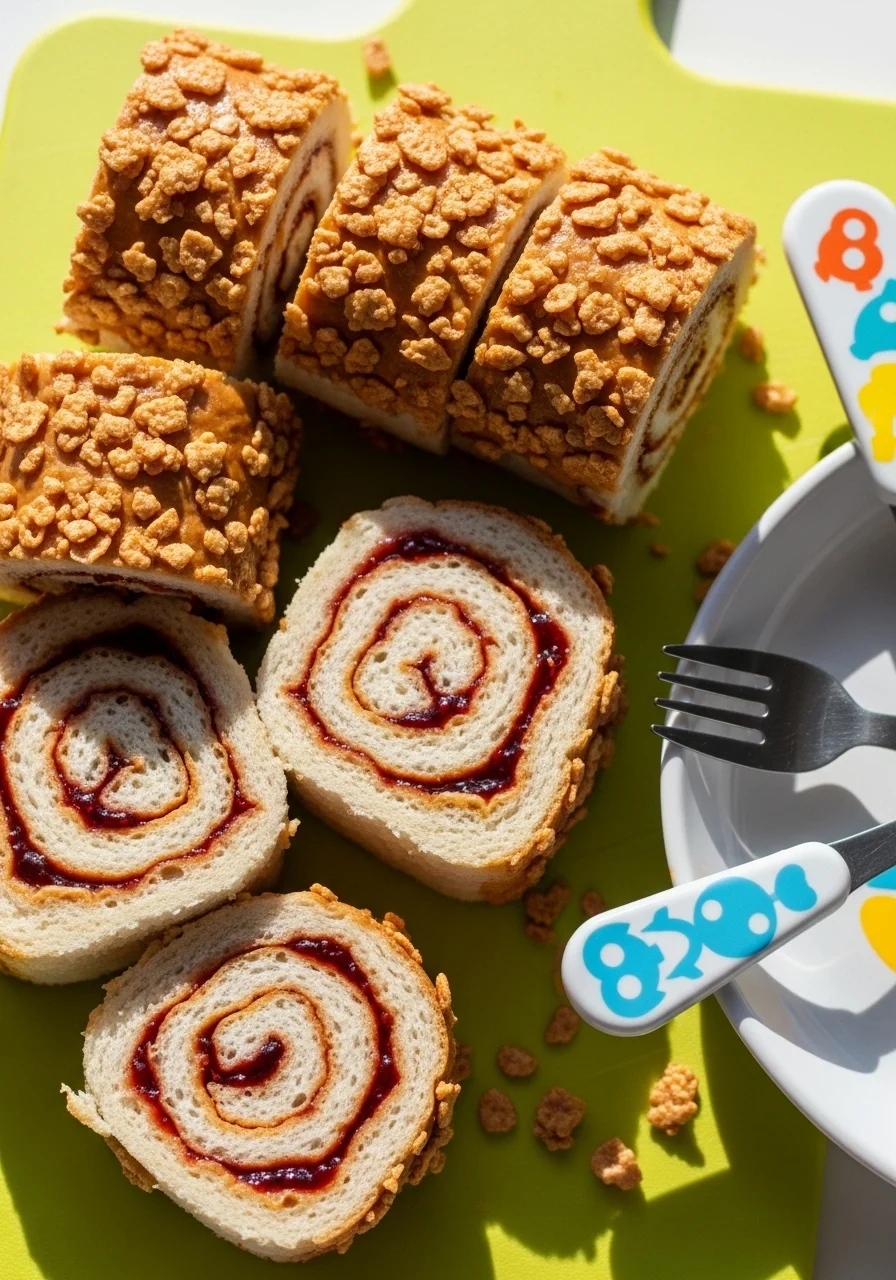
Peanut butter & jelly sushi rolls are playful and simple. Kids flatten bread, spread fillings, and roll tightly. The texture is soft bread with sweet jam and creamy peanut butter. They’re a fun twist on a classic sandwich and great for lunchboxes. Children like using cookie cutters to shape rolls. The smell is nutty and sweet.
Prep: 10 minutes | Cook: 0 minutes | Serves: 4
Ingredients
- 8 slices white or whole-wheat sandwich bread
- 1/2 cup creamy peanut butter
- 1/2 cup strawberry or grape jam
- 2 tbsp honey (optional)
- 1/4 cup crushed cereal or graham cracker crumbs
- 1 tbsp melted butter (optional, for brushing)
- Plastic rolling pin or flat bottle
- Cookie cutters for shapes (optional)
- Paper towels
Instructions
- Trim crusts from bread with a knife and flatten each slice with rolling pin.
- Spread 2 tsp peanut butter evenly over each flattened slice, leaving a small edge.
- Spread 1 tsp jam on top of the peanut butter.
- Roll bread tightly from one end to the other to form a log.
- Brush rolls lightly with melted butter if using for browning.
- Roll each log in crushed cereal or graham crumbs for texture.
- Slice each roll into 6–8 pieces with a sharp serrated knife.
- Use cookie cutters to make fun shapes if desired.
- Chill 5 minutes to firm up before packing.
How to Serve It
- Arrange sushi rolls on a bento tray with fruit and cheese cubes.
- Offer mini skewers or colorful picks for dipping into extra jam.
- Store in fridge up to 24 hours; pack in lunchbox with ice pack.
- Make-ahead: prepare rolls and keep wrapped until ready to slice.
- Pair with carrot sticks, apple slices, or yogurt for a balanced meal.
- Great for playdates and creative lunch ideas.
10. Mini Egg and Veggie Frittatas in a Muffin Tin
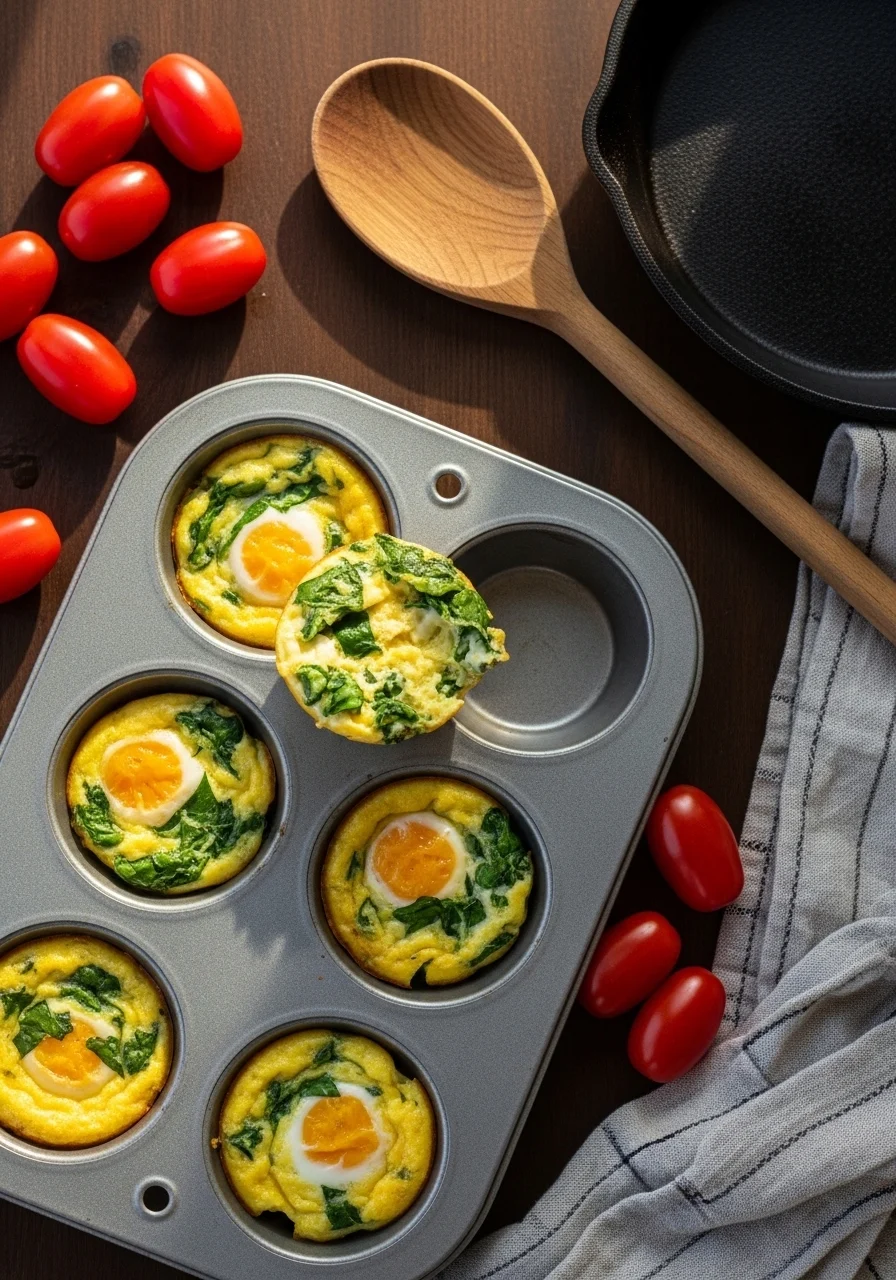
Mini egg and veggie frittatas are fluffy and savory. Kids can whisk eggs and add diced veggies and cheese. They bake into individual cups with soft centers and golden tops. These frittatas are perfect for breakfast, brunch, or snack time. Little hands enjoy pouring batter into muffin tin. The aroma is warm eggs with herbs and melted cheese.
Prep: 10 minutes | Cook: 18–20 minutes | Serves: 6–8 mini frittatas
Ingredients
- 6 large eggs, room temperature
- 1/3 cup milk
- 1/2 cup shredded cheddar cheese
- 1/4 cup grated Parmesan
- 1/2 cup spinach, finely chopped
- 1/3 cup red bell pepper, finely diced
- 1/4 cup green onions, sliced
- 1 small zucchini, grated and squeezed dry
- 1/2 tsp salt
- 1/4 tsp black pepper
- 2 tbsp olive oil or melted butter for muffin tin
- Nonstick muffin tin or silicone liners
Instructions
- Preheat oven to 350°F (175°C) and grease muffin tin with oil or butter.
- In a bowl, whisk eggs, milk, salt, and pepper until combined.
- Stir in cheddar, Parmesan, spinach, bell pepper, green onions, and zucchini.
- Spoon mixture evenly into 12 muffin cups, filling about 3/4 full.
- Tap tin gently to remove air bubbles and settle mixture.
- Bake 18–20 minutes until tops are set and slightly golden.
- Check doneness with a toothpick; it should come out clean.
- Let frittatas cool 5 minutes before removing from muffin tin.
- Store extras in fridge up to 4 days or freeze for longer keeping.
How to Serve It
- Serve warm on a plate with a sprinkle of extra cheese and chopped parsley.
- Pair with fresh fruit, toast, or a side salad for a balanced meal.
- Store cooled frittatas in airtight container in fridge; reheat in microwave.
- Make-ahead: bake and refrigerate or freeze; reheat as needed.
- Great for weekday breakfasts, lunchboxes, and kid-friendly brunches.
- Offer dipping ketchup or yogurt-based herb dip for extra fun.
You’ve just got ten easy recipes for kids to make at home that cover breakfasts, snacks, lunches, and desserts. There’s something for every mood: no-bake builds, quick bakes, freezer treats, and hands-on assembly projects. Save or pin this list so you can find it on busy days and share favorite recipes with friends and family.
Which recipe will you try first with your kids? Try one this week and tell others which one became the favorite.